Showing posts with label crafts. Show all posts

Friday, December 23, 2011

Fun with Flowers

Niecy-Nash We’ve been watching reruns of Clean House on Netflix.  It might be safe to say that Ashley and I are addicted to that show.  LOL  In any case, we love the big flamboyant flowers that Niecy Nash always wears in her hair – they’re always so colorful and fun. 

We want to be colorful and fun too!  But, have you priced these flower hairclips in the stores?  Florida 2011 119 We had found one on a headband this past spring (on clearance at Target) – and it looked so cute in Ashley’s hair for conventions.  At Disney, we added a cute little Disney pin to it to spice it up a  bit.

We have a family wedding coming up next week, and both Ashley and I are wearing shades of black and gray (traditional funeral colors, right?!)  I thought it might be fun to brighten up with a flower for my hair, so we stopped in Claire’s at the mall last Sunday to look for some flowers.  I wanted red, but Ashley talked me into a black one (which really defeated the purpose anyway!)  It cost a whopping $6.50 for a fake flower on a hairclip!  That’s highway robbery, people!

crafts 057 I did buy it; but afterwards I got to thinking that we need to figure out how to make these things.  So, after a trip to the Dollar Tree and Wal-mart yesterday, we turned out 10 hairclips in about an hour.  And guess what?  It cost less to create all 10 of them than it did to buy one!  Seriously!

I spent $3 for 3 bunches of flowers at the Dollar Tree – a poinsettia bunch, a daisy bunch, and I’m not sure what the other ones are (but there were 2 purple, 2 gold, and 2 green flowers on the bunch).  Then, at Wal-mart, I found the hairclips – 6 in a pack for $1.47.  The only other supplies we used were felt (a whole sheet of felt is only 20 cents and we didn’t even use 1/2  the sheet for all these clips), scissors, and a hot glue gun.

We made 2 “duds” before we really got the hang of it.  And, by the end, I was pulling flowers apart and combining colors, adding leaves, etc.  It was a fun project and yielded decent results.  Here’s what they look like in (my) hair:

crafts 051 crafts 052 crafts 049 crafts 050

Not sure why my hair looks so dark in that first picture.  But, anyway, you get the idea.  Cute, huh?  Both the daisy and the poinsettia are 2 flowers, combined/layered into one to make them fuller and to lay nicer.  The gold flower is exactly as it appeared on the bunch, but I added the leaves to it.  The purple/green flower is a combination of two flowers (we also made one of each color, as shown in the picture above). Now, Ashley wants to get some brighter-colored flowers and make some more! 

Which one is your favorite?

Friday, September 16, 2011

DIY Hydrangea Wreath

So, the other week, my mom informed me that the wreath on my front door had to go.  She was right, of course – it was my spring wreath (it had tulips in it)!  I don’t really have a summer wreath and it WAS pretty; so, I left it up! 

Anyway, lately I’ve been seeing these lovely hydrangea wreaths on the internet.  I have some limelight hydrangea bushes out front that are simply gorgeous; so I thought I might try to create a wreath of my own.  I had this old (and can you say “dusty”?!) grapevine wreath laying in my basement – so I used that as my base. 

One thing about the limelight hydrangeas is that the flowers on them are a different shape  than regular hydrangeas. While most others are a nice round ball, the limelight variety are more of a cone shape.  So, my wreath isn’t perfect or symmetrical; but I think it turned out looking pretty nice. 

crafts 018

What do you think?

I’d post a step-by-step tutorial, but it really wasn’t that tricky.  I simply cut off my hydrangeas (with several inches of stem), removed the leaves, then stuck them through the grapevine weath.  I used the extra stems in the back and weaved them under sections of the grapevine so they’d stay in place. 

I used FRESH-cut flowers.  I had some dry ones here from last year that I tried first, but the stems were too brittle.  I’m thinking that, with as easy as hydrangeas are to dry, that they’ll try nicely right on the wreath.  We’ll have to wait and see . . .

Monday, May 16, 2011

1-2-3 Textured Products

I received a craft kit from 1-2-3 Textured Products to review. I do still have a “preschooler” (though he just turned 5 and will be starting more “official” school soon). 1-2-3- Textured Products specializes in hands-on educational kits for little ones.  I know that, as a homeschool mom who is teaching 2 older children, I’ve been interested in things like this to keep my youngest busy. 

trans_tractor The craft kits offered by 1-2-3 Textured Products come in a variety of themes – including zoo animals, reptiles, forest animals, holidays, winter, party time, summer fun, fall fun, pond creatures, Christmas, farm animals, insects, and transportation.  Seeing as how I have a boy who HATES bugs, I requested a sample from the transportation category.  We received the Tuggy the Tractor kit ===>

Everything that you need for your child to create a textured craft is included in the kit, except for the glue.  You could easily combine a few kits to create a larger picture as well. 

Spring 2011 290 Ian was anxious to dive in and get started on his craft.  I gave him a glue stick, but we found that the extra elements don’t stick too well with a glue stick.  So, I ended up applying a stronger craft glue to the product, and he put on the goodies!  He chose what he wanted to put where and was pretty pleased with the results. 

While I probably wouldn’t purchase more of these kits for Ian (I’d say he’s just a bit too old for them, though he did enjoy doing the one that we tried), I would recommend them for younger children. 

I was not able to find the price of the individual kits like the one that we received.  They come packaged in such a way that leads me to believe they may be available at craft stores, though.  On the company website, you can purchase Activity Packs (which contain themed sets of 3 textured kits) for $4.99.  You can also order monthly “subscriptions” of these kits, which seems like a great idea for church groups and daycares. 

If you’d like to try a textured kit with your child, free samples are available (with a $1.50 shipping charge).  You can learn more about 1-2-3 Textured Products by visiting the website or following them on Twitter. 

NOTE: This is a MamaBuzz review. The product was provided by 1-2-3 Textured Products for this review.

Tuesday, May 3, 2011

Snap Fashion Jewelry Studio by Smart Lab Toys

snap_jewelry_main_image We recently received the Snap Fashion Jewelry Studio for review. My 10-year-old daughter always enjoys a good craft kit, and this one was no exception. 

Actually, that may not be entirely true . . . I think this kit IS an exception, simply because she loved it so much!  It took her no time at all to decide that this kit was something pretty special and she quickly created all the included “snaps” using the material provided.  Spring 2011 285 Then, she started making up ideas in her head of other things she could create using this kit; and she’s been carrying the accompanying book around with her for days, just perusing it and chatting about it! 

We even went out and bought extra material for her to use on the snaps.  Spring 2011 286 AND, she raided her dad’s closet for an old tie and swiped a scarf from her older sister – all to feed her addiction to this kit!  She enjoyed sharing her creations with my mom the other day – showing off the things she has created. It’s been fun to watch her excitement.

But, alas, the kit is all used up.  We searched online for a refill kit to no avail.  So, I e-mailed the company, asking if such a kit is available.  I got a very prompt reply (I e-mailed over the weekend and heard back from them first thing Monday morning).  Spring 2011 287 They are currently working on developing refill kits.  That put a smile on Gracie’s face.

One con to this kit is the circle template that is included.  It’s hard plastic and snaps onto the bottom of the “snap maker”.  However, ours went missing the first day and we have yet to find it.  We easily created a new one with cardstock; Spring 2011 288 but, obviously ours isn’t as nice or as durable.  I wish it would have been something that would have fit into the little “pockets” on the top of the product, rather than on the underside.

Snap Fashion Jewelry Studio is a product of Smart Lab Toys.  It is available for $24.99 direct from the company; or you can purchase from Amazon and select retailers. Spring 2011 289 Follow SmartLab Toys on Facebook and/or Twitter for deals and discounts, playtime ideas and free stuff.  You can also subscribe to their e-newsletter, and receive a 25% off coupon with your first newsletter.  SmartLab Toys also has free download-able activities for kids!  Check it out:  http://www.smartlabtoys.com/free-zone.html.

Guess what?!  I have a giveaway for you!

Smart Lab Toys has generously offered to provide one of my readers with one product (his/her choice) of Smart Lab Toys!

All you need to do to win is visit the Smart Lab Toys website and look around.  Then, come back here and leave a comment telling me what product you would pick if you are the winner.  That simple!

If you would like a few more chances to win, do one or more of the following (and leave a separate comment for each one):

  • Follow Smart Lab Toys on FB (using the link above)
  • Follow Smart Lab Toys on Twitter (using the link above)
  • Follow Heidi’s Reviews & Reflections on FB (use the link in my sidebar)
  • Follow me on Twitter (use the link in my sidebar)
  • Post about this giveaway on your blog, Facebook page, or Twitter – with a direct link back to this post

I will leave this giveaway open through next Tuesday, May 10th, at noon (EST), at which time I’ll draw a random winner.  Good luck!

NOTE: This is a MamaBuzz review. The product was provided by Smart Lab Toys for this review.  I was not compensated in any other way and the opinions expressed herein are entirely my own.

Tuesday, March 15, 2011

Wear the Adventure!

My friend Tonya from Live the Adventure has opened a new Etsy shop called Wear the Adventure.    In addition to the fact that Tonya and I are both homeschool moms, we also share a love of travel and an obsession with pressed (or as Tonya calls them “smashed”) pennies.  So, when Tonya first mentioned the idea of opening an Etsy shop to sell her one-of-a-kind pressed penny jewelry, I got really excited!

Needless to say, I was more than willing to offer a review of Tonya’s jewelry pieces.  Tonya knows that I’m slightly Disney-obsessed, so she offered me a choice of several Disney-themed penny pieces.  I chose an earthy-looking piece with an Animal Kingdom pressed penny, featuring Mickey Mouse!  Here is what Tonya has to say about this piece of jewelry:

The necklace is made mainly of natural materials, hemp and wooden beads, with a collectable pressed penny from the Animal Kingdom that features a joyful Mickey dressed in Safari garb. I've added a hand crafted bead shaped to resemble Mickey Mouse ears, which so far is customary to many of my Disney pieces. Retail on that piece would be $12.95 with a shipping cost of $2.50.

Here’s a picture of Ashley, modeling the necklace:

winter 2010 160

Adorable, right?  I love the simplicity of this piece.  It’s very casual – and, since I’m a casual, jeans and t-shirts kind of girl, it goes with my style.  Ashley, however, paired the necklace with a dress and wore it to church.  So, in other words, it’s a pretty versatile piece!

Here’s the story behind Wear the Adventure (as told by Tonya):

Wear the Adventure was born out of my love for travel and my obsession with pressed penny machines. The sight of one has left me scrambling for pennies and quarters so often in the past that I’ve now learned to carry a supply of coins with me at all times.

il_570xN.223185276 As my penny collection grew, I became bored with the idea of storing them in books or turning them into magnets to hang on the refrigerator. I wanted a practical way to display my memories, and then it dawned on me. Why not turn my pennies into jewelry? So I did. I now have necklaces, bracelets, earrings, even money clips from some of our favorite places. My very first piece is a beautiful charm bracelet from the Tennessee Aquarium - until I created that piece my family had no idea what I was talking about when I mentioned opening an Etsy store selling pressed or smashed penny jewelry.

I use many high quality, natural materials and combine them with collectable pennies, making many of the pieces one-of- a-kind.

il_570xN.225653406 Tonya has some ADORABLE pieces in her Etsy store!  You need to go visit and check them out.  A few of my favorites are the Disney Dalmation Smashed Penny Charm Bracelet, featuring a Cruella DeVil penny, dalmation and Mickey head charms, and red, white, and black beads.  il_570xN.220577279 Another piece that stands out to me is the Los Angeles Rhino Smashed Penny Necklace.  Tonya’s eye for detail really stands out to me in this piece.  The bead just has a “safari feel” to it, which goes so well with the rhino penny. 

I’d love for you to visit Wear the Adventure and tell me which piece is your favorite! The prices at Wear the Adventure range from $12.95- $32.95 depending on the material used, amount of pressed pennies and value of the pennies.

Tonya has graciously agreed to offer my readers a discount!  For the next two weeks, you can receive 15% off your total order by using the code HEIDI2011.  Hurry, though – this special discount code is only effective through March 29th.

NOTE: I received free product from Wear the Adventure in order to write this review. I was not obligated to write a positive review; but, quite frankly, I think these pressed penny jewelry pieces are sheer genius – I wish I would have thought of it!

Friday, November 26, 2010

Christmas Idea #2 – Simply Me Jewelry Designs

A few months ago, I signed up to win a contest that my friend (and fellow Crew mate) Jen was hosting on her blog. Jen’s cousin, Lindsay, creates hand-made jewelry.  I won the contest and was able to select an item from her Etsy shop, valued at $15. 

50272_103196396391955_2711_n When I originally entered the contest, I was thinking that I would choose something teal – similar to the design that Jen had pictured on her blog (shown here at right) – in honor/memory of my friend Sue and her battle with ovarian cancer.  However, when I actually found out that I had won the contest, it was after I had made arrangements to purchase another teal necklace in honor of Sue.

black and turq - swirl So, I started perusing Lindsay’s selection.  There were several pairs of earrings that attracted me, but I’ve got lots of earrings and –truth be told – I rarely wear them. 

Then, I came across the black and teal lanyard (pictured at left).  Having recently visited Williamsburg, where you have to wear a clip-on badge (as your ticket), I had lanyards on the brain.  The whole time we were there, I was thinking how much handier it would be to have lanyards to hook the badges to, rather than trying to clip them to an area of your shirt (and not worry about losing it – especially for little ones).  My kids all have their pin-trading lanyards from Disney World, and we had picked up a Dallas Cowboys one for Brian at Five Below.  That left me lanyard-less; and this black and teal one looked perfect!

This lanyard will also come in very handy at homeschool conventions.  No more tacky nametag wearing for this girl! 

Lindsay’s hand-made jewelry items would make great Christmas gifts and are very affordable.  If you like my lanyard, you can find more here.  She’s got lots of breast cancer awareness pieces too.  There are necklace sets on sale right now; and a brand new holiday collection. 

You can also follow Lindsay’s Simply Me Jewelry on Facebook. 

Sunday, May 2, 2010

Teacup Birdfeeders

Yesterday, I shared pictures of some of the supplies we were using to make a craft project for Mother’s Day.  I promised to share the final pictures.  So, here they are ---

spring 134

spring 138

spring 137

spring 136

spring 135

I found the tutorial for creating these adorable birdfeeders over at Cap Creations.  I had found the top “tea cup”, which I think is actually meant to be a planter, at a local craft shop’s going-out-of-business sale (got it for 50 cents!)  When I saw the tutorial, I knew that this was what I wanted to use it for.  Gracie and I went to a flea market/co-op type place and found the other cups and saucers.  We have a few more here in reserve – just in case we liked the way the project turned out – we could make some more. :)

The original instructions called for copper pipe and copper caps for the stands.  I priced these at Lowe’s (in the plumbing section) and they were over $7 each.  I tend to be rather thrifty, so I knew that wouldn’t cut it if I wanted to make several of these!  So, Brian and I went off to the local hardware store, bought 4 dowel rods and a can of brown spray paint, and I painted them up.  We got rubber caps (like you would use on chair legs) – they had a raised up section, which Brian easily sanded down to make them flat (for gluing on the bottom of the saucers). 

I was going to buy some old spoons, but we had some cheap ones that we had gotten at Wal-mart once and none of us like to use them – so we recycled!

I think the finished product turned out really nice. My mom has already commissioned us to make at least 4 more for her friends – and I think we’ll be making more too – I can see lots of uses for these as summer gifts. 

I love crafts but we don’t always have lots of spare time.  This was a quick Saturday morning craft that was not only simple but adorable!

What do you think?

Thursday, January 14, 2010

of sick kids, dogs, and hats

Today is a day of normalcy around here (at least, so far - it's only 1:13! I don't want to speak too soon and jinx things!) 

Gracie seems to be feeling much better.  She was my sickly little one - she had lots of asthma problems and would get very sick, very quickly - so I usually run her to the doctor quicker than I would the other two.  Yesterday, her throat was red and her glands were swollen (in addition to a fever of 100+).  Zithromax seems to be her wonder drug, so we grabbed some at the pharmacy (along with some Sucrets for kids) and headed home for day of rest. 

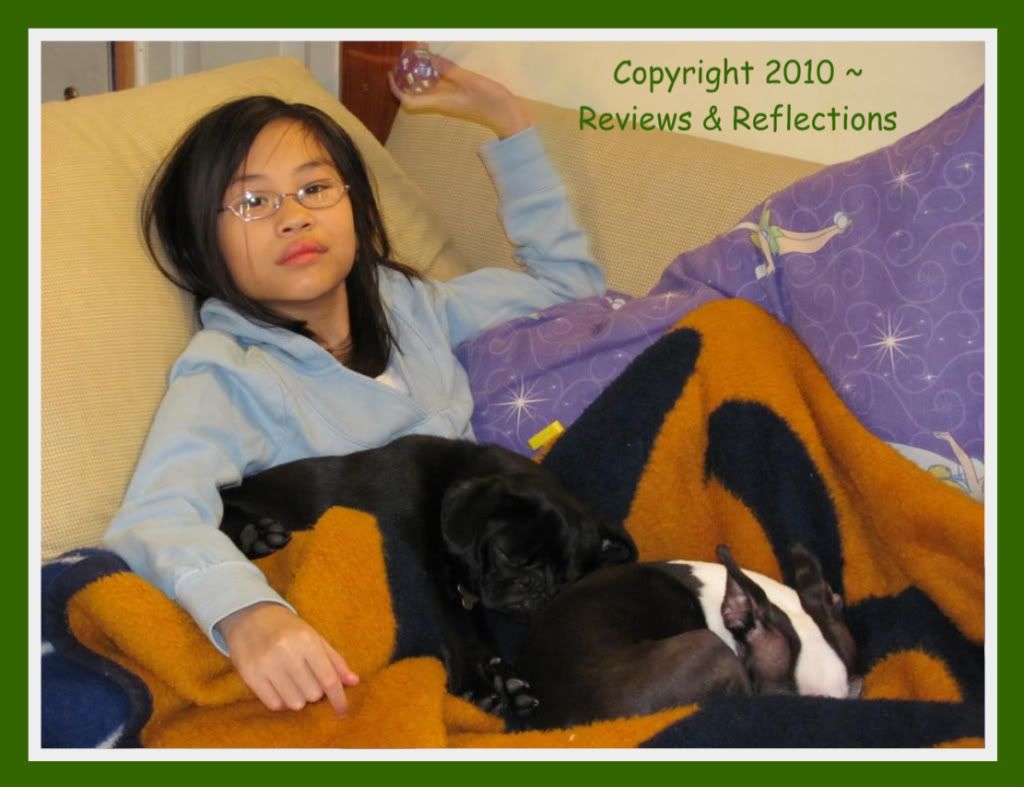
I think it's so sweet how dogs (and maybe cats too) can sense when their people aren't feeling well.  Yesterday, as Gracie chilled on the couch, both dogs knew that she was under the weather - so they stuck to her quite closely, making sure that she was well-protected.


Thankfully, she's feeling much better today - good enough to go to piano lessons and do school! 

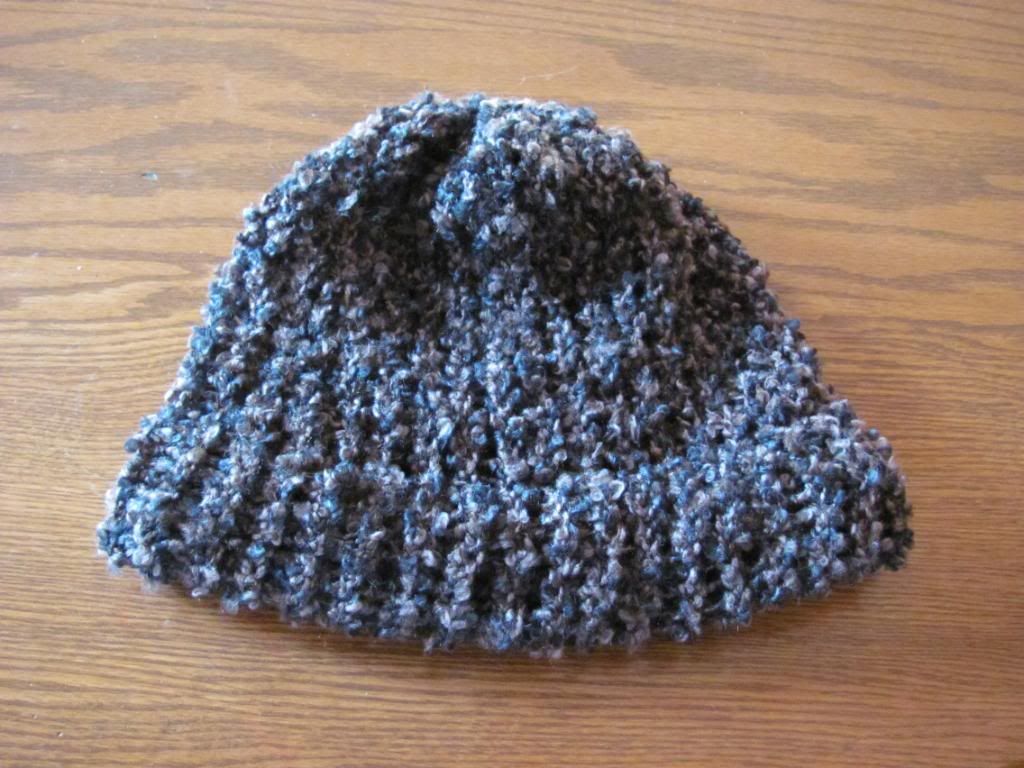
Over the past 2 days, she and I have been working with the knitting looms, and we were each able to complete a hat!  Who knew?!  The loom directions recommended heavy yarn (#5), but didn't really describe what kind of yarn.  I went for a more funky yarn, in shades of brown and  black.  I think a more normal yarn would have looked better (though this one wasn't too hard to work with).  Here is the finished product (this picture makes it look like there is blue in it - there isn't):


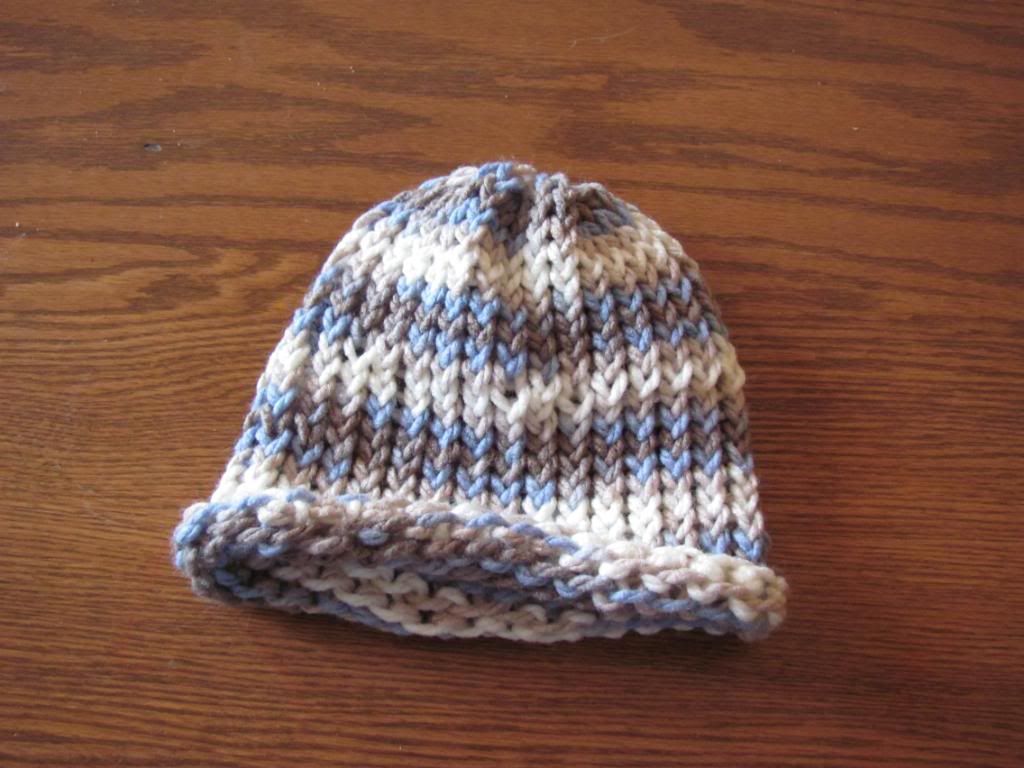
Gracie used the loom recommended for a children's hat.  However, the finished product is TINY!  We tried it on Ian and it was even small for him.  This one may become a gift for a friend's baby!  I love the way you can see the stitches  better with this yarn type, though:


I followed the directions to add a brim to my hat - Gracie didn't want one.  The hat kinda curls up at the bottom instead.  I looks cute.  Now, Ashley wants to take both skeins of leftover yarn and crochet matching scarves.  She's currently working on a multicolor, variegated scarf.

We need to find a good source for more yarn and go purchase some more.  I think Gracie will use the smaller adult-sized hat loom next time.  I want to try some other projects, such as scarves, etc.  I found some  great patterns online. 

What are you crafting?